With all the types of rock climbing that exist, it can be daunting for the climbing novice to understand which is which.
Virtually all beginners who learn to climb with an instructor start by top-roping, and with good reason. It allows you to experience the sport in a controlled, safe way with far less stress than a multi-pitch climb that takes you hundreds of feet off the ground.
In top-roping, the rope is tied to a climber at the bottom, fed up through an anchor at the top, and pulled back to the ground, where it is attached to a belayer. Compared to lead climbing, top-roping is rather straightforward. A basic understanding of anchor systems, however, is essential. Failure to rig the anchor correctly is likely to get someone killed.
The Slingshot system
The slingshot system is the most commonly used setup in top-roping. Basically, it’s just a belay that gets directed down to a stance where the climb begins. Here are the basics:
- Two anchors should be involved, preferably stout trees with trunks greater than 12 inches in diameter. The two anchors should share the load or, in climbing terms, be “equalized.” If no trees are available, a big boulder or a car can be substituted
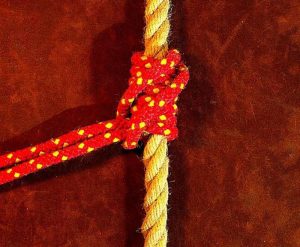
- The anchor slings should be tied with figure-8 knots for line, or with water knots for webbing. Girth-hitching the slings around the trees will keep the lines from sliding.
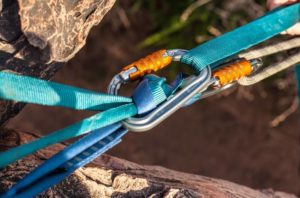
- The two anchors are connected to two locking carabiners, which are in turn connected to the climbing rope. The best choice for anchor slings is a static rope. Webbing is plenty strong but can be cut easily, especially under load. Sharp rocks under the anchor lines can be padded with shirts or a towel.
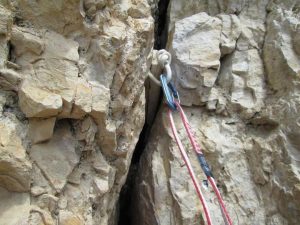
- The anchor should hang over the cliff line to avoid abrasion on the rope. Great care should be taken not to fall off while checking the position of the anchor. And be careful of knocking off loose rocks that can brain bystanders below. If needed, belay the person rigging the anchor from a higher point.
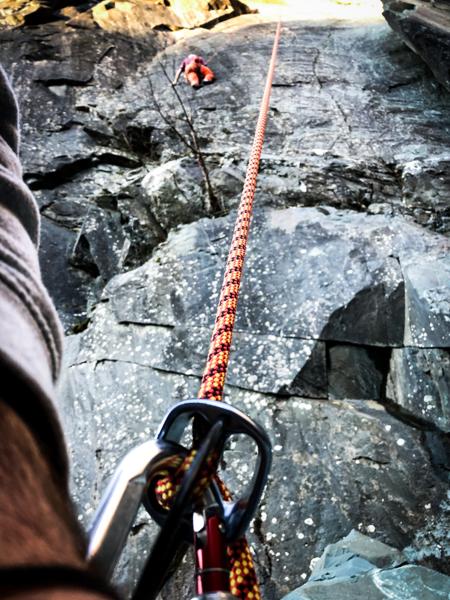
As the climber heads up the rock, the belayer takes in the slack in the rope; as the climber descends, the belayer pays it back out. The mindful belayer is ever ready to lock off the rope if the climber falls. Remember: The laws of gravity are cruel even to the kindest climber.
The ideal top-rope site is 75 feet high (at most), has solid anchors near the edge of the cliff, and has no loose rock or dirt around the top that could rain down on you. It should follow a fairly direct line from the bottom to the top. Rigged correctly and done with an able belayer, this setup is a reassuring way to climb because a fall can be arrested quickly and (usually) painlessly. If the belayer is doing his or her job, the biggest risk in top-roping is falling off the top while setting up or taking down the ropes. Be on guard!
Top-roping is not just for beginners; experienced hands often climb this way. It’s a safe way to hone technique since you can focus on the choreography of the climb rather than finding and placing solid protection. Advanced climbers tend to climb with more slack in the line than antsy beginners, who prefer a more snug line that will reduce the amount of airtime in the event of a fall. Although you don’t want your belayer to tug you up the wall, the gentle pull of the rope can be reassuring at first. Regardless, beginners should never climb with a slack line.
From the Top, But Not for Starters
You can, of course, set up a top rope so that the rope runs through an anchor at the top of the cliff and the climber is belayed by a partner standing above him at the cliff’s edge. If the belayer is well fixed in his position, there is no problem with giving a belay this way. The key ingredient is making sure the belayer is anchored solidly from behind.
Pushing the Envelope
Either way, top-roping enables climbers to push their limits without worrying about falling. The current thinking is that if you aren’t willing to take risks and fall now and again, you aren’t willing to grow as a climber.
Regardless of how hard you push the envelope, you should know that falling shouldn’t be taken lightly even if the top-rope setup is bomb-proof and the belayer is as vigilant as a Secret Service agent. Why? Falling scares the snot out of you, and you’re liable to bang rudely into the rock.
Getting to the Top to Setup
Getting to the top of the climb to set up the top anchor happens in one or two ways. In places like the Shawangunks, you can often hike a trail to the top of the crag, in which case your guide or experienced friend will walk up, set up the top anchor, and have you belay him down from whence he came. He can also walk back, but it’s less fun.
Professional guides use the acronym RENE (Redundant Equalized, with No Extensions) to describe their anchor systems. This makes up what they call a “bombproof” anchor. Redundancy is the key here; never trust your life to just one piece of gear. Always prepare for the worst possible scenario, that an anchor, for instance, is not stable, and anchor to two separate points.
If there is no trail to the top, someone must lead the route, setting up anchors (or “protection”) along the way. As your leader heads up the rock, he or she uses a carabiner to clip the rope to a piece of pro. Once the lead climber passes the new anchor, any falls are limited to the distance between the climber and the last anchor plus the distance again as the fall continues past the anchor before the rope finally pulls taut. Clearly, lead climbing is not a beginner’s job. It’s good to know the procedure, however, since you are likely to be belaying the leader.
Once your intrepid leader has reached the top, he or she will anchor the rope to a tree, rock horn, or some other immovable object, and then walk or rappel down. After that, your top rope is set and you’re ready to roll.
Top Anchors vs. Bottom Anchors
Clearly, the bottom anchor isn’t as crucial as the one on top, since the belayer’s body weight is a natural anchor. While you often see climbers belaying without tying themselves into an anchor, it really is prudent to tie the belayer to the ground either with a rope or by tying the rear of the harness to a solid anchor.
Why? Anchoring your belayer ensures that he or she won’t be flung into the cliff in the event of a fall. Also, if a rock is dislodged from above, it will keep the potentially freaked belayer from running. Although that may sound a bit far-fetched, it happens. The bottom line is that it’s important that the belayer be positioned far enough from the wall so that the odds of being struck by a falling rock are between slim and none.
Tying One On
Even if climbing deities Reinhold Messner and Sir Edmund Hillary could set up a top-rope for you, it wouldn’t be worth a rocky hill of beans unless you’re wearing your harness correctly and the harness is tied to the rope with a solid retraced figure-8 knot. Initially, these two basic facets of climbing will seem confusing. The harness might seem like a medieval pair of underwear and the knot a twisted trick best left to Harry Houdini. Don’t fret. In time they’ll become as automatic as tying your shoes.
Even though you will quickly become accustomed to wearing your harness and tying it to the rope, experts do get careless and make mistakes that often end in tragedy. Always check your harness and knot, as well as those of your partner. It’s called the “buddy system,” and it works.
Here’s what you should look for before leaving the ground:
- Make sure the buckle on your harness is threaded correctly; that is, the waistbelt is doubled back on itself through the buckle.
- Make sure the rope passes properly through your harness. Different designs have different specifications. Read the manufacturer’s instructions carefully.
- Make sure the retraced figure-8 knot is tied correctly and secured with a double overhand knot.
- Make sure you check the integrity of your harness buckle and figure-8 knot throughout the climb. No matter how grumpy you or your partner may become, keep checking each other out.
Belaying Your Partner
Although belaying your partner is a rather simple procedure, it requires practice and sensitivity to the climber above. Both the belayer and the climber must inspect their harnesses and knots before the climbing begins. Check that the harness is doubled-backed, that climber is tied in properly, and that the carabiners are loaded correctly.
Once you are anchored securely, you’ll decide which hand is your brake hand; that is, the hand that will secure the rope in the event of a fall. Usually, if you’re right-handed, your right hand will be the brake hand, though some people prefer it the other way around. The other hand becomes the guiding hand, which will, well, guide the rope to the climber or help take in any slack.
Here’s an important thing to remember at the indoor gym as well as at the popular outdoor crags: When you find yourself at a crowded venue, it’s only natural to check out the other climbers. Remain vigilant; don’t let your eye wander while you’re belaying. Spacing out at the wrong moment can mean the difference between an “innocent” fall and one with dire consequences. As my first-grade teacher used to say: “Pay attention!”
Never let go of the rope
I know I keep hammering this point, but it’s crucial: The first thing to remember when learning how to belay is to never let go of the rope! This is a tad tricky and requires time and practice before it becomes ingrained. At first, it’s best to watch your hands, not the climber. Soon enough, you’ll be able to do both. Once the practice becomes second nature, you can watch your mate as intently as you like.
Here’s the nitty gritty on belaying:
1. While the left (guide) hand reels in the rope to maintain tension as the climber heads up the rock, the right (brake) hand pulls the rope through the belay device. If your partner is climbing well and you’re in sync, this should be a smooth, nearly rhythmic movement cross between flying a kite and milking a cow.
2. To get back to the best position to reel in more rope, slide the guiding hand up the rope and reach a couple of fingers across to grab the brake side of the rope ahead of the brake hand. Without letting go of the brake hand, slide it back down to the belay device.
Now you’re ready to do it again. Continue to reel in more rope until the climber shouts, “Off Belay!”
3. If your partner falls, bend the rope as quickly as possible across the belay device with your brake hand.
As usual, you should have a seasoned climber show you how to do this. The rest is practice, practice, practice.
Lowering Your Partner
When your partner wants (or needs) to be lowered, you should keep the following tips in mind. (Although this is a simple procedure, accidents often happen.)
- Communication is key. The lead climber will yell, “Lower!” or “I’m done, fried, finished,” or any other pithy comment that gets the job done.
- To lock off the rope, bend it across the belay device.
- Lean back to establish a good balance. Don’t let out any rope until the climber’s full weight is on it.
- Put both hands on the brake side of the rope and slowly and steadily lower the climber by letting the rope play through the device. To monitor the speed of the descent, watch the braid of the rope as it passes through the belay device.
- Only when the climber is standing safely on the ground should you take tension off their harness. Even then it’s good form to wait for your mate to say “Off belay!”
Belaying Instance
Finding a solid and comfortable stance is important when you’re belaying. Think of yourself in an imaginary tug of war. Stand with your feet a bit past shoulder width, with one foot forward, the other back and to the side as if you were fencing. Your center of gravity should be over your hips.
If your partner falls, your body will absorb the initial impact and lessen the impact on the anchor behind you (the last line of defence). If the system is set up correctly and you’ve been on guard, you’ll be surprised how easily you can catch a climber who weighs as much as an NFL middle linebacker.
Communication is Key
Communicating effectively while climbing is crucial. Without a verbal understanding of what’s up, you might as well be climbing in the dark. If you are belaying and can’t figure out what your mate has said, remove any slack from the rope and ask again. There will be plenty of times when you’ll be near a raging stream or in a wind that can muffle your words like a heavy blanket. When in doubt, shout like your house is on fire.
Furthermore, in areas where climbers are often within earshot of each other, follow each cue with your partner’s name to avoid confusion. “On belay, Moe?” “On Belay! Curly.” (Although if someone named Joe or Shirley is nearby, it could get confusing.)
Heading back to my car on a windy but otherwise perfect fall day in the Gunks, I nearly had a heart attack watching a woman perched on a ledge 50 feet off the ground with no protection. What happened? Her belayer heard a nearby climber say “Off belay!”
Fortunately, he realized his error and was fine, but the misunderstanding had disaster written all over it.
Finally, don’t shout long detailed comments between climber and belayer. Keep them short and clear, and if you aren’t sure what you’ve heard, ask again. It’s better to keep the rope on the belay and to remove any loose slack than to assume that the climber no longer needs the belay.
The 15 Belaying Commandments
Climbers have their own lingo, born over time and out of necessity. (I’ve put an exclamation mark after each command to emphasize the importance of speaking loudly and clearly.)
- “On belay!” A sacred phrase that means the belayer has checked the harness buckle, anchor, knots, and belay device setup, and is in a position to accept responsibility for the lead climber. Again, check both your partner’s harness and tie-in knots.
- “Climbing!” The climber, poised at the base of the rock, makes sure the belayer is ready. When all is right with the universe, he or she utters this magic word.
- “Climb!” or “Climb Away!” This is the belayer’s way of telling the climber to have at it.
- “Up rope!” The climber wants the belayer to reel in some of the slack in the rope.
- “Slack!” The lead climber feels the rope is too tight.
- “Take!” or “Tension!” or “Hold me!” The person above needs to hang on the rope. The belayer should lock off the rope and hold the climber’s weight until otherwise noted.
- “Watch me!” If the climber feels gripped by fatigued or is worried that the next move is risky, this command alerts the belayer to be ready to break a fall.
- “Falling!!!” Need I say more?
- “Rock!” When a rock takes to the air, this is the call.
- “Off belay!” The leader is on firm ground at the top, anchored, or tied up by a band of masked men. In short, your job as a belayer is temporarily on hold.
- “Belay off!” The belayer is taking the climber off the belay. Make sure you use this command before you actually perform the task.
- “Got me?” The climber wants to come down. Before you put your weight on the rope, you darn well want to make sure you’ve got a friend.
- “Lower me!” Once the climber is in good hands, he or she has a free ride to terra firma.
- “Again?” If either of you can’t hear what the other has said, don’t be coy.
- “Thanks!” or “Thanks, dude!” When all is said and done, a little gratitude goes a long way.
Safety Review
When you read reports of climbing accidents, it becomes clear that the majority stem from human error. Climbers often are so jazzed to get to the rock that they rush through the standard safety procedures. Keep the following oft-repeated tips in mind, and your day at the crag will remain another good memory:
- If you have any doubts about your belay system, keep tinkering with it until it’s fail-safe. And remember to double-check all knots, biners, and harnesses.
- Check your partner’s harness and knots as well as your own.
- When belaying your partner, be attentive. A life (and your conscience) depends on it.
- When you reach the top, make sure the belayer below is ready to take your full weight. “Got me?” is the thing to say.