There are few things that offer you the same sense of adventure and unlimited possibilities like jumping into a kayak on a clear, calm day. For the adventurous spirit, the call of kayaking on a beautiful mountain lake or along a scenic coastline is hard to resist, even if you’ve never done it before.
If you’re one of those adventurous souls who hasn’t yet had the opportunity to jump in a kayak and paddle into the sunset, it can be a little daunting trying to figure out how to get started.
Fear not, whether you’ve never been kayaking or just need to brush up on your skills, this guide is intended just for you. You’ll get a crash course in learning how to kayak and be able to hit the water with confidence.
Common First-Time Kayaker Questions
1.) Do I need to take lessons?
While it’s not a strict requirement, taking a paddling course is a great way to get started on the right foot.
Not only will you learn proper paddling techniques and about staying safe while kayaking, you’ll also get to know other paddlers in your area. Hitting the water with some paddling buddies is a lot of fun and is safer than going solo.
2.) Do I have to buy all the gear to get started?
No. One of the best ways to get a feel for kayaking and make sure you like it before buying all the gear is to take a paddling course or guided kayaking tour. Both of these will provide the essential gear needed to get you on the water.
Going out with an experienced guide will give you a taste of what kayaking is like before dropping some money into gear.
You can also look into renting the essentials from a local kayak rental shop. They should also be able to give you some suggestions for good paddling locations based on your skill level.
3.) Is kayaking hard?
No. One of the great things about kayaking is how accessible it is to people of varying abilities and experience levels.
It’s also pretty easy to get started. Most of the basic aspects of kayaking can be learned within a few minutes.
You’ll learn those basics in this guide. Here’s an overview of the topics that will be covered:
- Where to go
- What to bring
- How to get in and adjust your kayak
- Correct posture and how to hold the paddle
- Basic paddling techniques
Where to Go
When you’re first starting out, your first couple of trips should be focused on getting familiar with your kayak and building your skills. Save the more challenging waters for after you have a few trips under your belt.
What to look for:
- Flat water with minimal current. Small lakes, ponds, and slow-moving rivers are ideal.
- Areas that are sheltered from wind and waves.
- Gently sloping shoreline for an easy launch.
What to avoid:
- Open ocean. Conditions in open, exposed water can change unexpectedly.
- Steep, rocky shorelines.
- Fast currents.
- Areas with lots of motorized traffic on the water.

What to Bring
Knowing what to bring out with you on the water can make or break your trip. Just remember that you’re better off being over-prepared rather than underprepared, especially on the water.
If conditions are cool, clothing becomes a special consideration. You should know what to wear when kayaking in cooler weather.
Essential Kayaking Gear
- PFD (personal flotation device) – Any Coast Guard-approved PFD will work but you’ll be much more comfortable in a kayaking-specific PFD. Just make sure it’s the right fit for your body.
- Paddle – There are several styles to choose from but the most important thing is to get a paddle that is the right size for the height and width of your kayak. You’re better off with a cheap paddle that is sized correctly rather than a poorly sized, expensive one.
- Dry bags – Expect at least some water to get inside your kayak. Use dry bags to keep your water-sensitive gear and extra clothes dry.
- Bilge Pump – Pump out water that gets inside your kayak (only for sit-in kayaks).
- Whistle – Used to signal for help or to get somebody’s attention. They’re cheap and will make a world of difference if you end up needing it. Keep it accessible.
Personal Items
- Water & food – How much will depend on the length of your trip. It’s always a good idea to bring more than you think you’ll need. Better to have too much than not enough.
- Extra layers & change of clothes – It’s a good idea to have extra clothes in case conditions get cold or wet, especially if you’re further away from shore.
- Sunscreen & sunglasses – The sun’s rays can be reflected off the surface of the water and can be fairly intense even on cloudy days.
- Headlamp – This can help you see where you’re going but, more importantly, helps you be seen by other motorized traffic on the water. Essential if you’ll be paddling around dusk or dawn.
- First aid kit – Always a good idea to have on hand. You can buy a kayaking-specific emergency kit or build your own and store it in a waterproof dry bag.
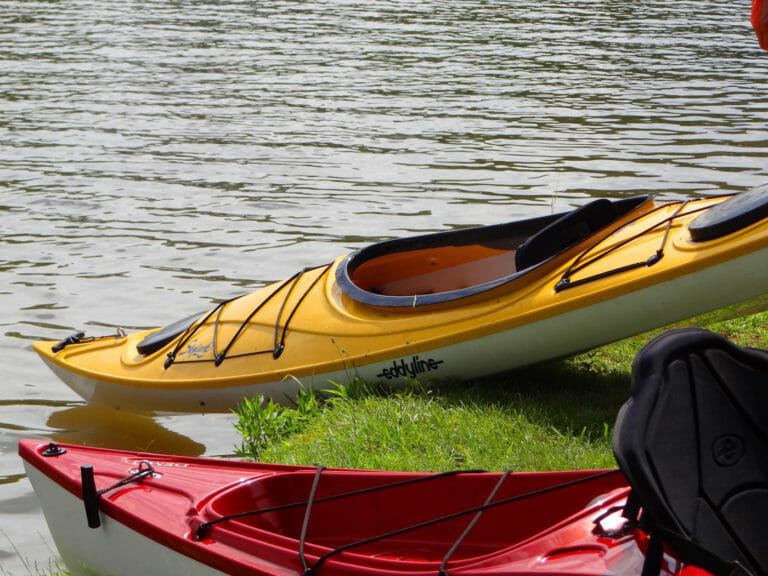
How to Get in Your Kayak
Getting into your kayak will become second nature once you’ve done it a few times. Those first few times can be a bit awkward, though. Typically, you’ll be launching either from the shoreline or a dock.
Shoreline
The best shorelines to launch from are calm and have gradual slopes with nice sandy bottoms.
Getting In
- Position the kayak nose first into the water so it’s resting along the shoreline.
- Slide the kayak far enough into the water to make sure the section under the seat is just past the water’s edge.
- Grab your paddle and position yourself next to the seat.
If you’re using a sit-on-top kayak:
- Straddle the kayak with your feet on either side.
- Drop yourself into the seat of the kayak.
- Make any last-minute adjustments and push off when ready.
If you’re using a sit-in kayak:
- Rest one end of the paddle on the rear rim of the cockpit and one end on the shoreline.
- While holding the paddle tight against the rim of the cockpit, sit on the paddle shaft and use it as a bench.
- While staying seated on the paddle shaft, slide your legs into the cockpit.
- Slide yourself into the seat of the kayak.
- Make any last-minute adjustments and push off when ready.
Docking
When launching from a dock, find the lowest point on the dock. The higher the dock is from the water, the harder it’ll be to get in. The trick for launching from a dock is keeping a low center of gravity while you slide into the kayak.
- Place your paddle on the edge of the dock so you can grab it once you’re in the kayak.
- Position your kayak in the water so it’s parallel to the dock
- Sit down on the dock next to the seat of the kayak and place your feet in the kayak.
- Turn your body so it’s facing the same direction as the kayak.
- Keeping as low as possible and holding onto the dock, slide your body decisively into the seat of the kayak.
- Make any last-minute adjustments and push off when ready.
How to Adjust & Sit in Your Kayak
Properly adjusting your kayak will help you be more stable and comfortable on the water. You’ll also paddle more efficiently and get more power out of your strokes if you’re sitting with an upright posture.
The easiest time to take care of your adjustments is when you place the kayak at the water’s edge and before you push off. It can be awkward to make adjustments when you’re already on the water.
Feet
Most kayaks come with foot pegs that are on adjustable tracks. With your butt snug against the seat back, place the balls of your feet on the foot pegs with your heels angled slightly inward. Make sure your knees have a little bend to them; imagine making a kind of diamond shape with your heels and knees.
Adjust the foot pegs until you’re in the right position.
Knees
Again, your knees should have a slight bend to them while resting on the foot pegs. Make sure they’re in contact with either side of the cockpit – this will help you brace against the kayak and improve your stability and paddling power.
Back
If your seat is adjustable, try to position it so that your back has an upright posture. You can adjust it to a more laid-back position if you’re relaxing but an upright position will give you better balance and more power while actively paddling.
An upright position will also help prevent lower back discomfort on longer trips.
How to Hold Your Kayak Paddle
Holding the paddle incorrectly is a common beginner’s mistake. Here’s how to hold it.
- Face the concave part of the paddle blade toward you – Usually, the paddle manufacturer will put their logo on the concave side of the paddle blade so it’s visible when you’re paddling. You want to be ‘scooping’ the water as you paddle.
- Point the long edge of the paddle blade up – Some paddle blades are not uniformly shaped; one edge of the blade is longer than the other. The long edge of the paddle blade should be pointed up. If your paddle doesn’t have a long edge and a short edge, either edge can be pointed up.
- Hold the paddle centered on your body – Holding the paddle in front of you, line up the center of the paddle with the center of your body.
- Place your hands slightly wider than shoulder-width apart – Your hands should hold the paddle slightly wider than shoulder width and your elbows should be at 90-degree angles.
- Use a relaxed grip – Holding the paddle too tightly will cause the muscles in your forearm to get tired more quickly. Try making a circle around the paddle shaft with your thumb and index finger then lightly closing your other fingers around the paddle shaft.
Paddling Strokes & Proper Technique
Using proper technique will help you get the most enjoyment out of your paddling. Improving your technique and learning new strokes will come with time
Quick Tips
- Most of your paddling strength will come from torso rotation, not your arms. Focus on rotating your torso and not relying on your arm strength. Try to rotate from your hips and not just your shoulders.
- Push slightly with your feet and brace your knees against the inside of the cockpit.
- Fully immerse the paddle blade in the water to get more power out of your strokes.
Forward stroke
The forward stroke is your bread and butter stroke. It’s used to move the kayak forward in a straight line and is what you’ll be doing most of the time when you’re out on the water.
Steps
- Twist your torso and immerse one of your paddle blades into the water roughly next to your foot.
- Rotate your torso and move the paddle blade through the water.
- When the blade is slightly past your hips, pull the blade vertically out of the water.
- Repeat with the opposite side.
Tips
- Most of your power should come from your core but you can push and pull a bit with your arms for some extra ‘oomph’.
- Keep your paddle angle high so the paddle blade is right next to the kayak. This will make sure you’re pushing the kayak forward rather than turning it to the side. Pretend like you’re checking the time and looking at an imaginary watch on your wrist.
- Think about ‘pulling’ the kayak to where the paddle blade is rather than pulling the paddle through the water.
Reverse Stroke
The reverse stroke is what you’ll use if you need to back up. You can also use it to slam on the breaks if you’re already moving forward. It’s essentially the opposite of a forward stroke.
Steps
- With your torso facing forward, place the blade of the paddle in the water next to your hips.
- Rotate your torso as you push the paddle with your lower hand and pull with your upper hand.
- Pull the blade out of the water when the paddle blade gets close to your feet.
- Repeat on the other side.
Tips
- Keep the same orientation you would for paddling forward. Don’t worry about twisting the paddle around so the paddle blades are facing away from you.
- Keep an eye over your shoulder to make sure you don’t bump into other paddlers.
Sweep Stroke
The sweep stroke is what you’ll use to turn your kayak. While you can also turn by paddling extra hard on one side of the kayak, it’s not very efficient and uses a lot of energy.
Steps
- Rotate your torso and immerse the paddle blade in the water next to your foot.
- Draw an arch through the water as far out from the kayak as you can comfortably reach without losing your balance. Do this while rotating your torso and pulling with your lower hand and pushing with your upper hand.
- When the paddle blade reaches the back of the kayak, pull it vertically out of the water.
- Repeat as needed until you’re facing the right direction.
Tips
- Keep the paddle blade as far as you comfortably can from the kayak as you move through the stroke. This will provide the most turning power. If the paddle blade is close to the kayak, you’ll be pushing the kayak forward rather than turning.
Draw Stroke
The draw stroke is used to shift your kayak over to the side without having to turn. It’s particularly handy if you’re a few feet away and parallels to a dock or another paddler and you want to move towards them.
Steps
- With your torso facing forward, reach your paddle out to your side away from the kayak.
- Turn your paddle slightly so the face of the blade is pointed down at the water.
- Slide the blade into the water and pull yourself toward it by pulling with your lower hand and pushing with your upper hand.
- Lift the paddle out of the water and repeat as necessary.
Tips
- The draw stroke can put you off the balance if you overextend yourself. Start slow.
Final Tips for First-Time Kayakers
Before you head out, there are a few final things you can do to help make sure your trip is a success.
1. Check the Conditions
Check the weather and water conditions before heading out. Some of the things you’ll want to make note of are:
- Air temperature
- Wind strength and direction
- Water temperature
- Tides and currents
Being aware of these things will help you know what to prepare for and help you avoid paddling conditions that you’re not quite ready for.
2. Choose the right kayak
There are a number of different kayaks, each built for a different type of kayaking. The most common types of kayaks are:
- Recreational – Stable but slow. Doesn’t fare well in rough conditions.
- Sea Kayak – Fast but unstable. Good for rough conditions.
- Touring – Fairly fast and stable. Does a decent job in adverse conditions.
- Whitewater – Intended for use in rivers with stronger currents
Know what type of kayak you’ll be using and respect its limitations. Taking a recreational kayak out into choppy and windy open water conditions isn’t the best idea, especially if you’re still learning the ins and outs of kayaking.
3. Dress for the water, not the air
When you’re just starting out kayaking, it’s easy to only dress for the air temperature outside and forget about the water. You’ll learn pretty quickly that this is a novice mistake if you tip your kayak or get very wet due to getting splashed with cold water.
Expect to get wet and learn what to wear kayaking, especially in cold conditions. Here are a few pointers.
- Dress in multiple thin layers rather than one thick layer.
- Wear materials like polyester and wool that will still insulate you if they get wet.
- Avoid wearing cotton – it’s the absolute worst thing you can wear in a wet and cold environment.
4. Know how to rescue yourself and others
Capsizing a kayak is always a possibility, even for experienced paddlers. At the very least, you should be aware of the steps involved in basic rescue techniques. Ideally, you’ll take the time to practice them in a controlled environment so you’re prepared if the need arises.
Brush up on kayaking safety is a good idea in general. Take the time to learn common safety mistakes and how to avoid them while you’re out on the water.
5.) Get out and have fun
Now that you’ve got a handle on the basics of kayaking, it’s time to get out and practice. Don’t forget to have fun when you’re out there.
Remember, kayaking is about enjoying the journey. That includes having fun on your personal journey of mastering the fundamentals of kayaking.
If you’re excited to get going but still not sure where to go, check out these amazing kayaking destinations for some inspiration.