If you’re lost in a forest at night and it begins to snow, you might have to make the choice to bed down for the night, and you’ll need a shelter to help keep you warm. Survival shelters can protect you from the elements and help you retain vital heat in your body while you develop a plan for reaching safety. These survival shelters can help you in a variety of forest biomes, and they all have one feature in common: your ability to improvise with available gear and natural resources.
The Tarp Shelter
Make a tarp shelter out of any tarp-like material, such as an actual tarp, a piece of plastic sheeting, a foil emergency blanket, or a collection or waterproof clothing items, such as jackets and pants. Depending on available gear and resources, you can vary the style of the shelter. If you have trekking poles and a tarp, for instance, you may stick the poles into the ground and then reinforce their position by piling rocks around the base of the poles. Drape a tarp over the top of the poles and secure the material with parachute cord, if available, or cut strips of available clothing, such as a bandana, to secure the tarp to the poles.
If you have a tarp or a tarp-like material, but no trekking poles, you can use available gear to drape the tarp over a long branch, suspend the tarp between two tree trunks, or suspend the tarp from its center to create a tepee-like structure. No matter which method you choose, your goal is to create a dry space beneath the tarp where you can rest protected from the extreme sun, rain, or snow.
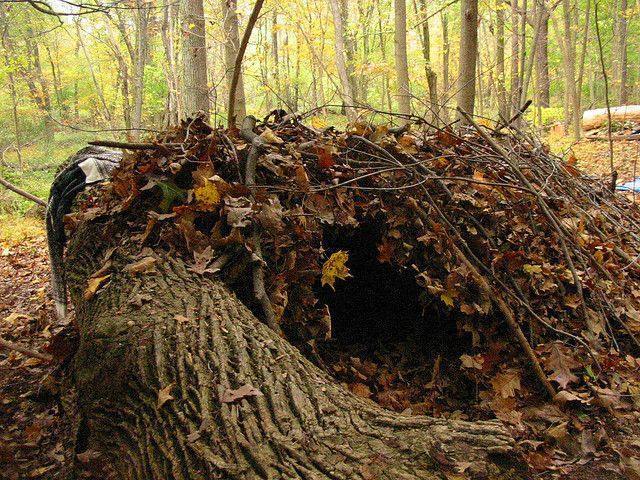
The Natural Debris Shelter
If you need to make a shelter in a forested area, tree branches and fallen trunks can provide a good base for your structure. Look for a slender fallen trunk, which you can use to create a ridgepole. Leave one end of the pole on the ground, and raise up its other end two or three feet by placing it on a stack of wood, rocks, or a tree trunk of that height. Secure this pole by any available means such as tying it to a stable base with parachute cord or stacking rocks or logs around it for stability.
Now, lean large sticks from the ground to the top of the ridgepole the entire length of the pole. Place the sticks at a steep enough angle to shed water and to create a space within which you can shelter. Put smaller sticks and branches across the large sticks to create a lattice upon which you can pile insulating material such as leaves, pine needles, and grasses. Pile insulating material on top of the ridgepole-lattice structure base up to three feet thick, and add a layer of branches on top so that the insulating material doesn’t blow away in the wind. If spruce trees are available, stack spruce branches in a downward-pointing direction, as they will shed water efficiently in this way and provide nice insulation. Finally, find a large vegetated branch that you can use as a door, and pull a pile of insulating material towards the entrance to close the shelter and create an insulated space while you sleep.
The Dugout Shelter
Look for a natural depression or hole in the ground, and clear away any pine needles or leaves that may be covering it. Determine whether or not the depression may be wide and deep enough for your body; if not, use branches or rocks as tools to help you deepen the depression. Your goal is to create a depression deep enough below the ground surface where your body can fit comfortably.
Once the hole is deep enough for your body, place branches or slender trunk poles across the top of the hole. Leave a space at one end of the hole for an entrance where you can crawl underneath into the dry, insulated space you create. On top of the branches and poles, place smaller branches crosswise to fill any gaps and to create a lattice-like structure that can withstand the insulating material you pile on top. If you have any type of tarp or an emergency blanket, place it on top of the poles before adding insulating material.
Pile leaves, pine needles, and other vegetation on top of the structure you’ve built over the hole to insulate the space. Pile branches on top of the insulating material to keep it from blowing away, and place a large vegetated branch near the entrance that you can use to pull over the entrance once you’re safely inside. The dugout will not be the best shelter choice if rain is in the forecast, as water could pool in the hole if your insulating material isn’t optimal or if you haven’t constructed it properly.
Make each of these shelters more comfortable by adding leaves or pine needles as bedding, which will also provide natural insulation beneath you to help you keep warm and cozy while you sleep.