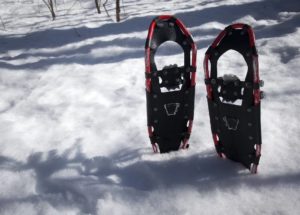
Simply put, avalanche transceivers, or avalanche beacons as they are more commonly known, are battery operated tools for finding another avalanche beacon. When turned on in the transmit mode the beacon emits a pulsing signal, and when switched to receive it will pick up the transmitting pulse of another beacon(s).
All modern avalanche beacons transmit and receive on the same frequency, so that isn’t a concern when looking to buy a beacon. What you want to look for is a beacon that is easily operated in the field with features that you can get to know thoroughly.
Avalanche beacons can vary in cost but will average several hundred dollars. However, weigh this against the value you place on your life if you’re buried in an avalanche or the life of your friend or loved one if you are on top of the snow searching for them.
If you are new to skiing in avalanche prone terrain or don’t intend to spend a lot of time in that environment you need a simple to operate beacon. Simple enough that you can put it away for a while, take it out for your next tour and still know the routine of battery check, self-test, partner test and, of course, switching between transmit and receive modes.
Understand How an Avalanche Beacon/Transceiver Works
When turned on and in the transmitting mode, avalanche beacons send out electromagnetic signals. All avalanche beacons produced after 1996 operate on the same internationally recognized frequency, 457 KHz. In most high school physics or general science classes, you probably learned what flux lines look like when you studied magnets and how they repel and attract.
This is the same pattern that beacon signals are emitted on, and when a beacon/transceiver is buried and transmitting its signal along flux lines other beacons in a receive mode can home in on the signal and follow the flux lines. The flux lines are interpreted by the receiving beacon and made to appear as a visual display and an audio sound that with practice will lead to the point of the transmitting beacon.
Best Avalanche Beacon Features For Recreational Skiers
I use the term ‘recreational skiers’ to differentiate from professional rescue personnel trained in the use of all the advanced features available on high-end beacons and backcountry enthusiasts who spend a lot of time touring, who should also have a working knowledge of all features on their personal device. In a post-avalanche situation, there are no recreational users – every able-bodied person on top of the snow becomes a first responder for the person or persons buried.
Here are avalanche beacon features that are needed to quickly locate the buried transmitting beacon and the person wearing it.
Range
The effective range of a beacon is obviously important because the quicker you pick up the buried transmitting signal the quicker you can do a fine search and home in on the exact location. Beacons can come with either an analog or a digital signal configuration. Although it is generally accepted that the analog signal range is greater (and analog models are cheaper) the learning curve to efficiently and effectively use an analog is much harder to master than the use of a digital model.
For the average, i.e. beginner and occasional backcountry/sidecountry skier it’s well worth the extra money to buy and become intimately familiar with using a digital beacon. All the popular digital beacons have a range of +/- 50 meters.
Number Of Antennas
The most popular beacons can come with either two or three antennas. For us, more is better, and the third antenna aids the accuracy of the fine search when you are homing in on the exact location.
Multiple Burial Detection
If you are skiing with a small group and an avalanche leaves you and maybe two others on top, but buries two or three of your companions, locating those buried becomes much quicker if your beacon has a multiple burial detection function. You can mark the site of the first located beacon and move on to the next while your companions work to extract the first victim.
Ease of Use
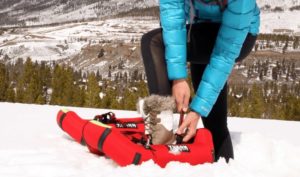
If someone were to give you (average, occasional BC/SC skier) the most expensive avalanche transceiver on the market, but understanding how to use it without getting caught up in all the advanced features would take a season of instructional training, you might think twice about owning it. You want to easily know how to actually do a battery test and a partner test, and you especially want to understand all the readouts and visuals associated with your personal beacon. Take Heed
Winter Backcountry travel is inherently dangerous. There is always the risk of serious injury or death. You are solely responsible for your actions and decisions. Familiarize yourself with the use of the avalanche beacon/transceiver you are using, and understand that an avalanche beacon will in no way prevent you from being caught in an avalanche. Learn proper skiing techniques, avalanche awareness, and exercise good judgment in conjunction with using your beacon properly.
Carry your beacon, and remember you are skiing at your own risk when in the sidecountry or backcountry. An excellent introduction to what it’s all about just outside the resort boundaries or deep in the backcountry is the Utah Avalanche Center’s basic “Know Before You Go” avalanche awareness video.